How To Export From Your DAW – Pro Tools
- Save your session as to make a new copy, so you can go back to the old one after this 🙂
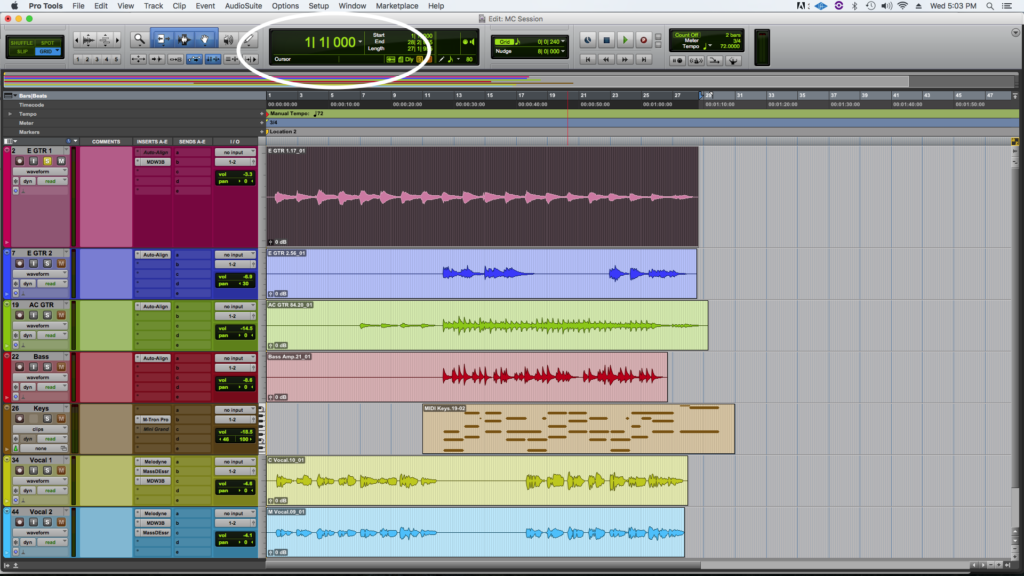
- In the editing window, solo the first track, or group of tracks, in your session, and select the audio for the track from the beginning – at 0:00:00 or 1 | 1 |00.
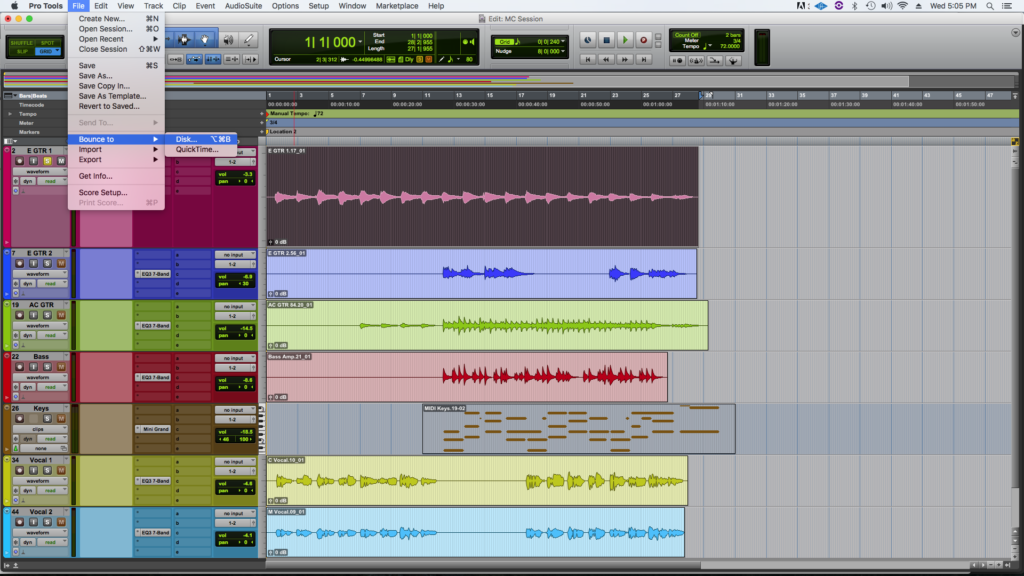
- First we’ll make a copy with all of your plug-ins and effects.
- With the track still selected, go to File -> Bounce To -> Disk
- When the window box shows up, make sure to set your “Bounce Source” as your main outputs, usually 1-2.
- Then use the following settings:
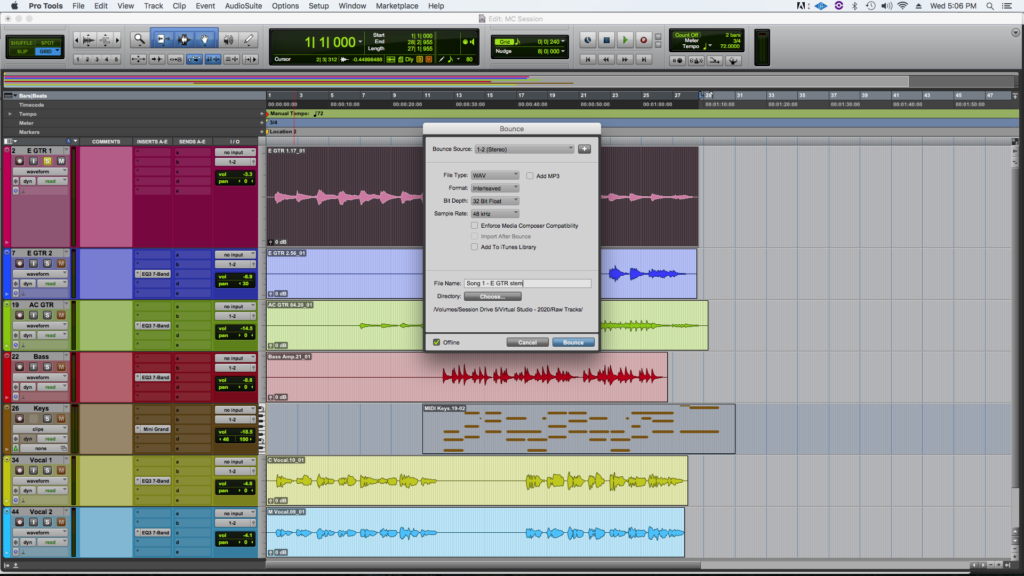
File Type: WAV
Uncheck “Add Mp3”
Format: Interleaved
Bit Depth: 32 or 24
Sample Rate: 48 kHz (or higher if you’d like)
File Name: Email – Song 1 (Instrument – Wet)
- Then make & choose a folder and hit “Bounce”!
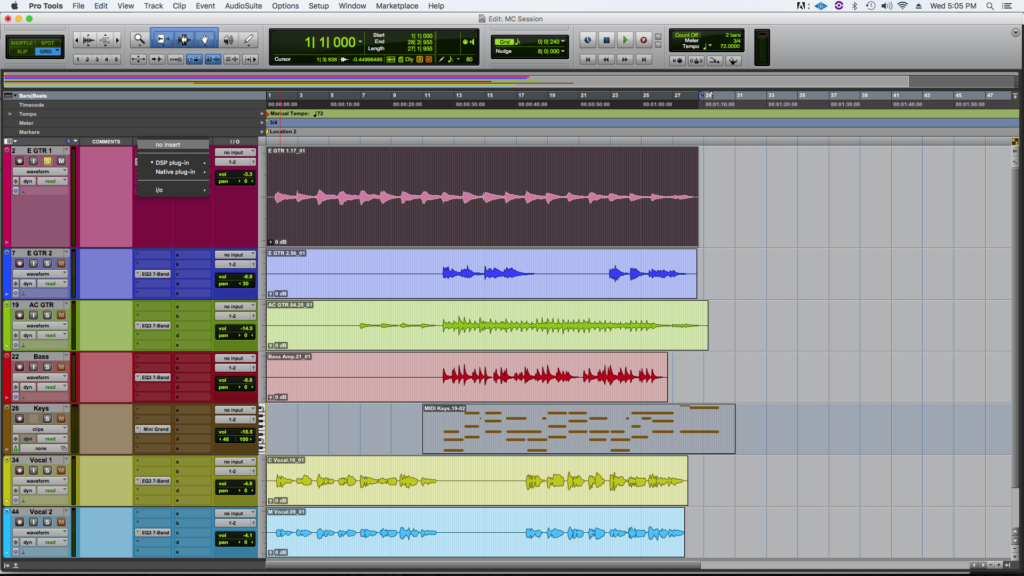
- Next we’ll make a copy without any plug-ins and effects. Remove any plug-ins that you have on the track, set all volumes to 0, and pan everything to the center. If you’re doing a group of tracks, you can skip the volume & panning step. If you have automation, you can leave it if it’s essential.
- Go back to Step 4 and repeat for all wet stems.
- Repeat this for all the tracks in your session, and please do groups of tracks as much as you can, for example:
- Kick
- Snare
- Rest of Drums
- Percussion
- Bass DI
- Guitar DI
- Keyboards (Non MIDI)
- Keyboards (MIDI)
- Lead Vocals
- Backing Vocals
MIDI Export
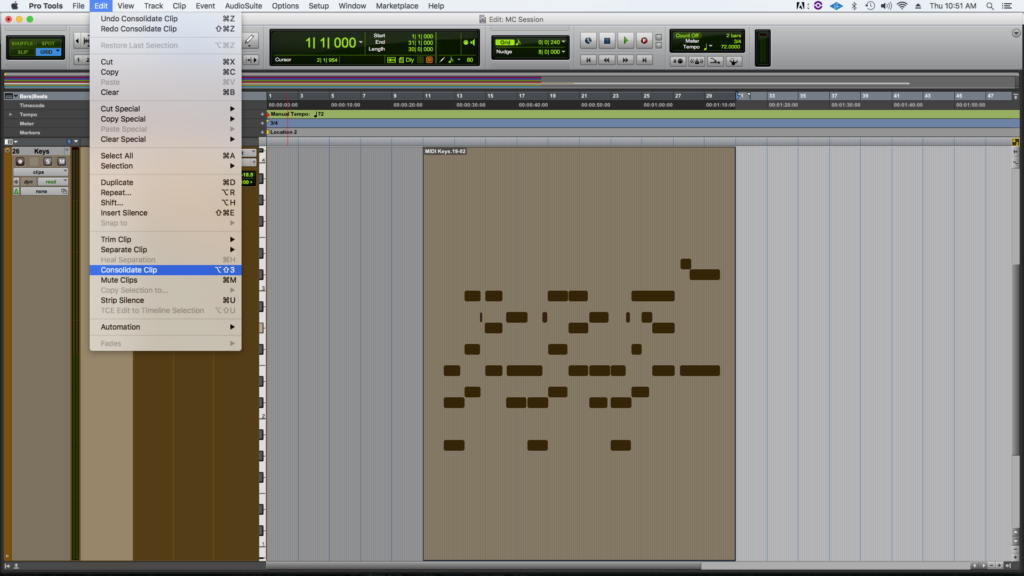
- In the editing window, locate your MIDI track and select the MIDI file, then hold down shift and drag the selection for the track to the beginning – at 0:00:00 or 1 | 1 |00. Don’t move the MIDI, just select to the top and go to File -> Consolidate Clip.
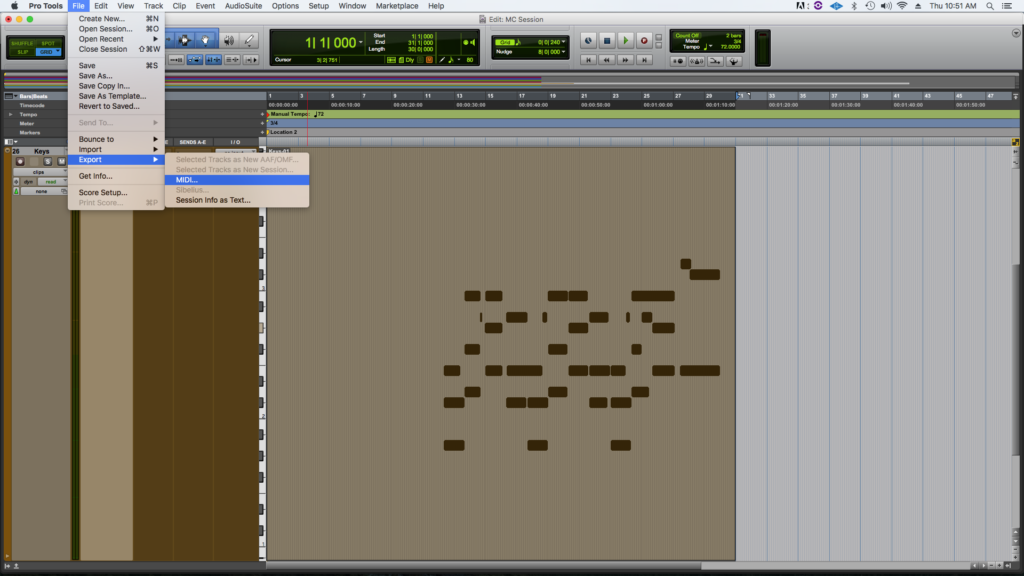
- Then go to File->Export->MIDI
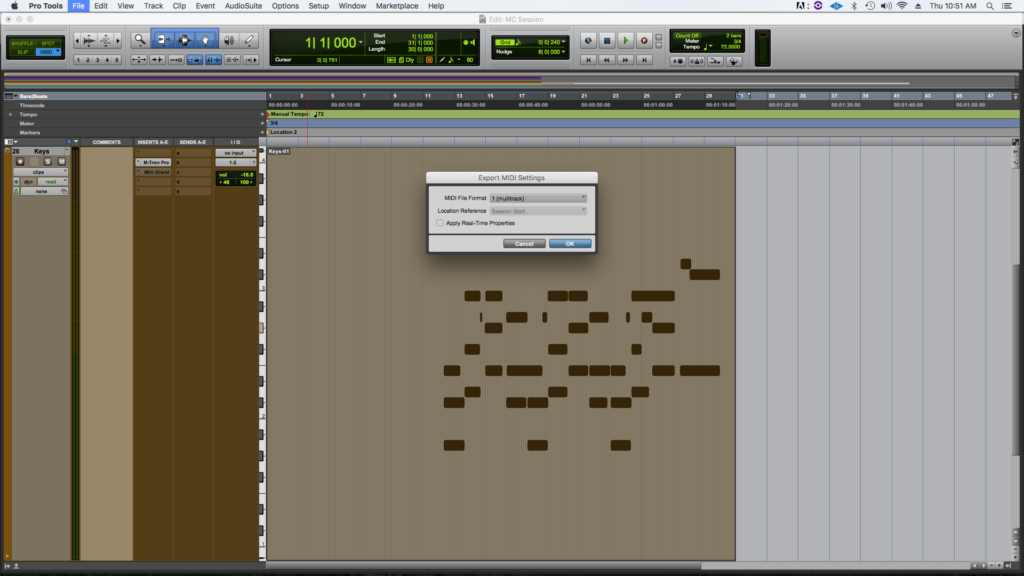
- Choose MIDI File Format as “1 Multitrack”
- Then give it a proper name with your Email included, and bounce into the same folder as the audio files!